How To Use Your Reliefband
Directions For Use

AREA
Find the starting area on the wrist. Using either wrist, the correct area is in between the two tendons on the underside of the wrist – two finger widths from the first crease in the wrist.

APPLY
Clean the area first. Apply a small drop of gel and spread in a circle about the size of a large coin with an even sheen.

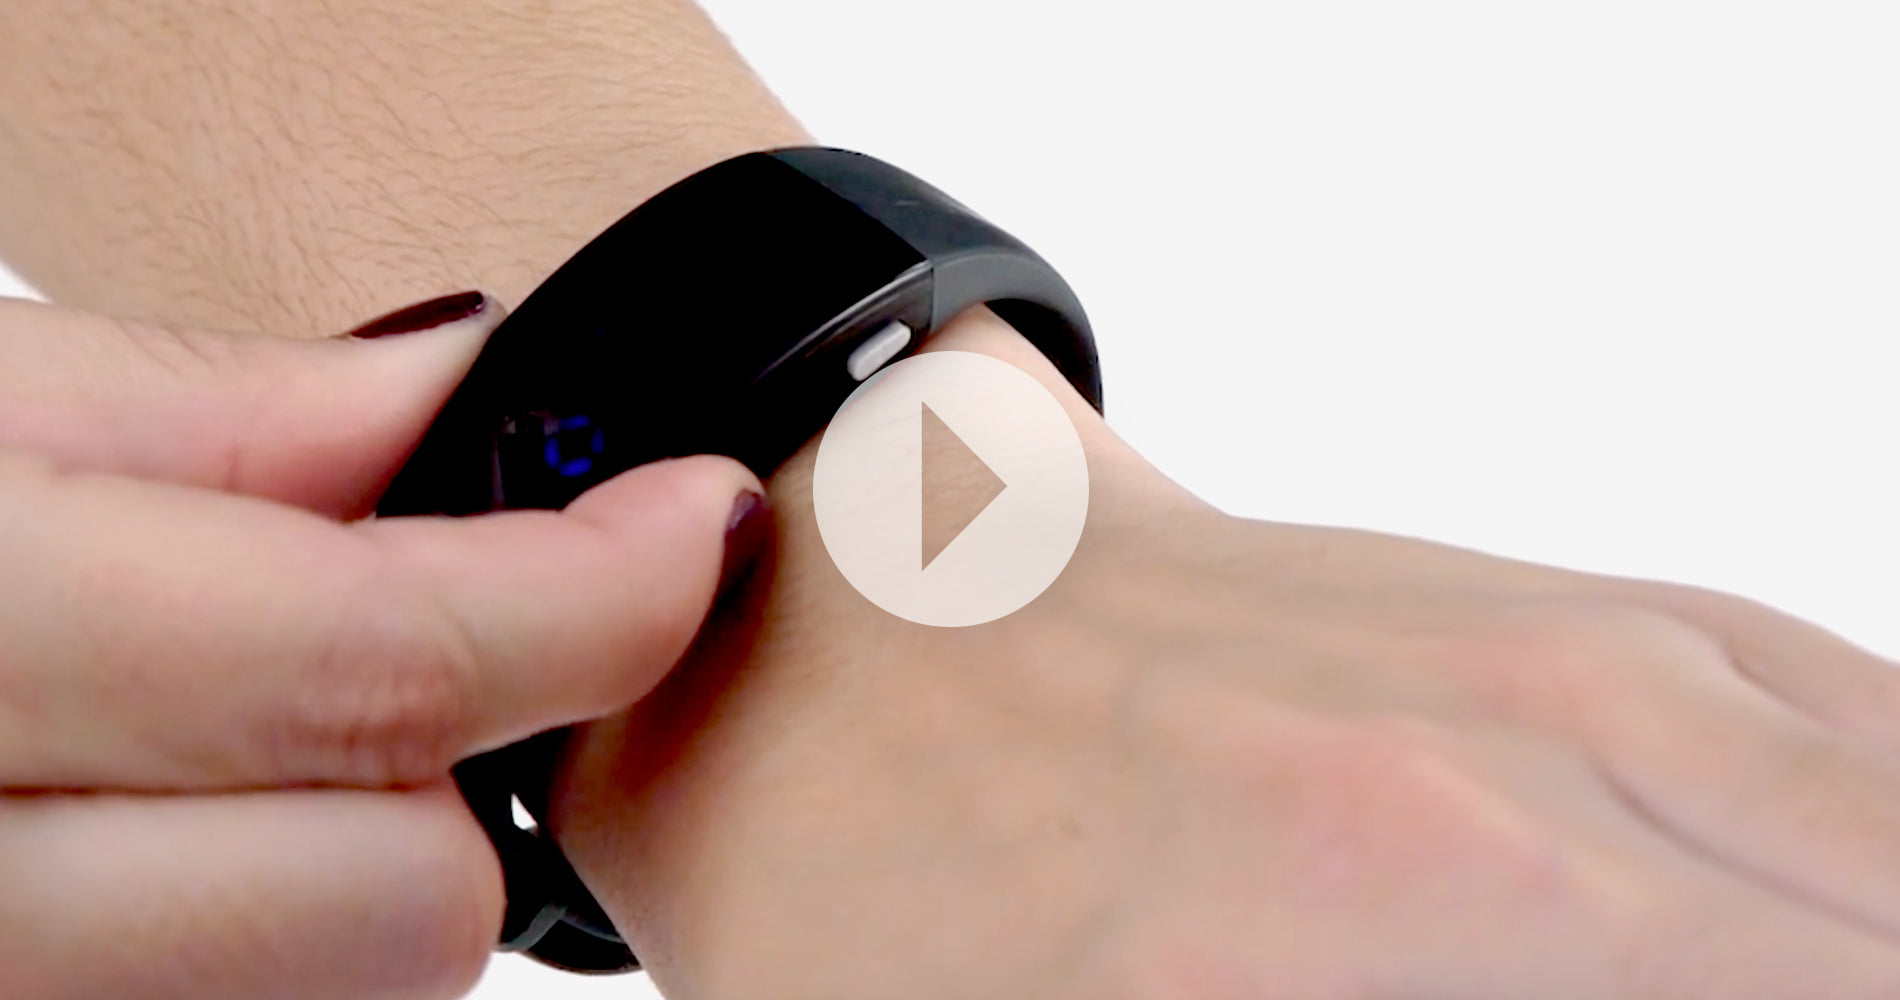
ADJUST & ACTIVATE
Place the device over the gelled area and fasten device snugly. Press the power button to turn on the device. Starting at power level 1, increase stimulation until tingling is felt in palm and middle finger at a comfortable level. Press the power button for 3 seconds to turn the device off.
How To Use Your Reliefband Sport
Tips For Effective Use
- While still on the wrist, turn Reliefband® off periodically to determine if you still have nausea and vomiting symptoms. If you still have symptoms, then turn it back on immediately.
- When finished using Reliefband®, take it off your wrist and remove the gel from your wrist and the device with a tissue.
- Try Reliefband® on each wrist and use it on the wrist where the greatest tingling is felt at the lowest setting.
- For some people, applying and rubbing in the gel twice assists in nerve stimulation.
- Reliefband® Gel should be re-applied every 2-3 hours, any time after washing, or if stimulation decreases.
- If you have sensitive skin, then wipe the band, contacts, and skin around wrist with a clean, damp wipe (no soap or cleanser) before reapplying gel.
- Store Reliefband® in a safe, dry place. Keep it away from young children.
- When not using Reliefband®, be sure to turn the power off to extend battery life.
- You can apply extra gel if the tingle feels too strong on level 1.
